Hang Gutters: Install Rain Gutters Step-By-Step Guide

Before you install the gutters, follow this gutter installation guide: fasten the gutter into the fascia brackets (so it’s secure), check the installation process, and ensure your gutters drain into rain gutters and downspouts to protect your home from water damage.
If you’re a homeowner dealing with overflowing water, muddy landscaping, or mystery stains on siding, your gutter setup may be the real problem—not the roof. The good news: a smart gutter swap is one of the most practical weekend projects you can do to protect your home from water. In this guide, you’ll learn how to hang gutters the right way, what makes a gutter system work, and how to set slope, downspouts, and connections so you get clean drainage and avoid water damage.
Why this is worth reading: Most “bad gutters” aren’t bad at all—they’re just installed without enough planning. A small mistake in the gutter run, a misplaced downspout, or a weak attachment to the fascia can turn a brand-new gutter into a leaky mess.
Quick outline (so you can follow along)
Gutter installation: what to know before you start
Roof + fascia: when it’s time to replace your gutters
Measure + layout: plan downspouts and drainage
Slope: set the high point and the end of the run
Rain gutter choices: material and style basics
Installing: hangers, fascia brackets, and mounting
End cap + seams: sealing and assembling sections
Downspout: outlet placement and routing
Water flow: testing and final checks
Gutter guards: maintenance after the job is done
DIY gutter installation: what a homeowner should know before you start
A gutter doesn’t just “catch water”—it controls where water goes after it hits your roof. A solid gutter setup moves water off the edge of the roof gutter, into the channel, down a downspout, and out to a safe discharge point. When that chain breaks, water can soak siding, rot wood, and cause expensive water damage near the foundation.
Before you start installing, think in systems. Your gutter system is only as good as its layout, attachment points, and how the downspouts move water away. Even if the project seems easy to install, it’s worth slowing down for the planning steps so you don’t redo sections later.

If your existing gutters are sagging, dented, or pulling away, it may be time to replace your gutters—a quick look at the gutter end and loose gutter pieces can help confirm whether you need a full swap or just a small fix for proper gutter installation.
Roof + fascia: is it time to replace your gutters?
If you’re debating whether to replace your gutters, start with a quick visual check at the edge of the roof. Look for sagging runs, rust stains, peeling paint on the fascia, and any areas where the gutter has pulled away. If you see staining behind the gutter line or soft wood, the fascia board may need repair before you mount anything new.
Also check for old fasteners and bent metal. Old gutters often fail at attachment points, corners, and joints. If you have existing gutters, pay attention to where the problems repeat—those spots usually reveal a layout issue (wrong slope, undersized downspout, or a weak connection to the fascia).
One more thing: if your roof and gutter line has a drip edge or needs a gutter apron, make sure it’s in place. This helps water drop cleanly into the gutter instead of running behind it.
Measure gutter length and plan the gutter run (downspouts & drainage)
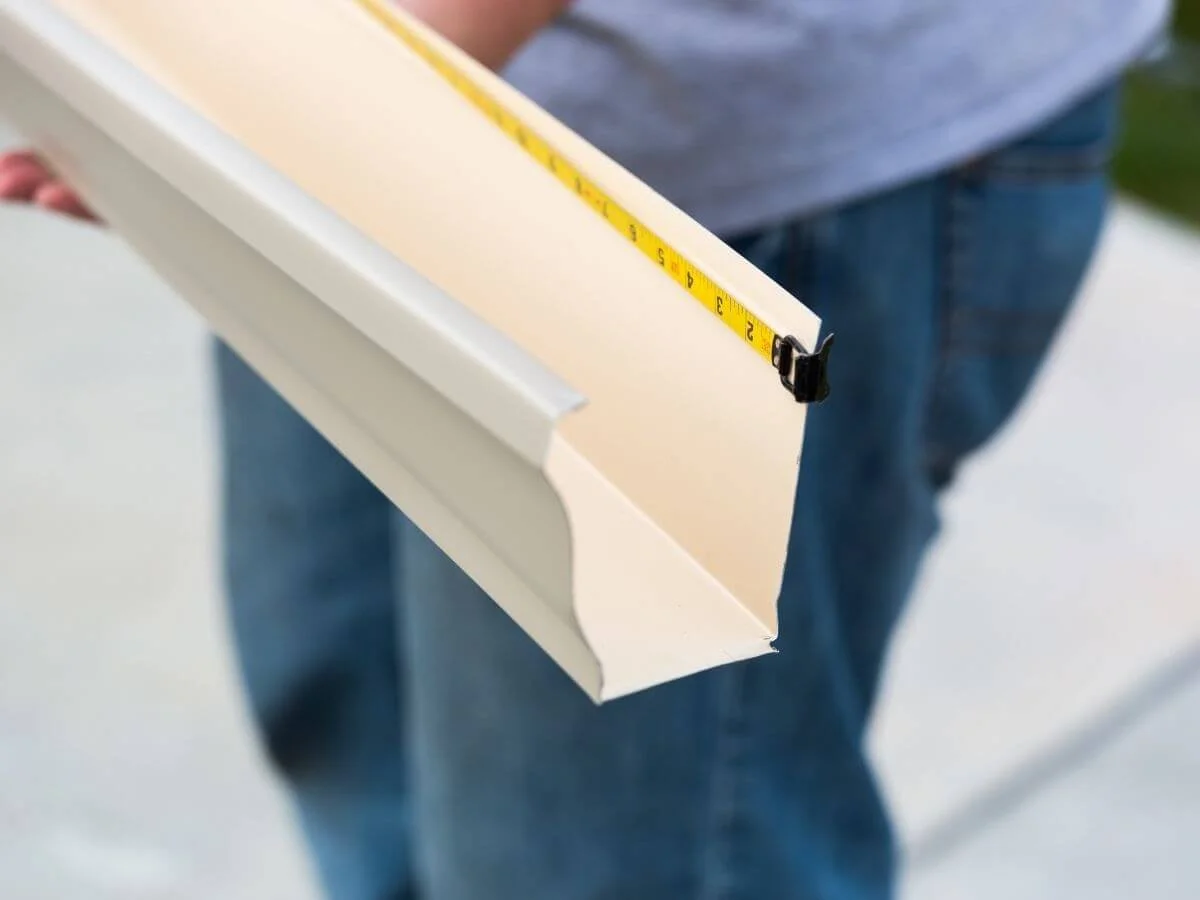
Planning is where most “DIY regret” happens—so do this part carefully. First, measure the length of gutter needed for each side of the home. Write it down as total feet of gutter and then break it into each gutter section you’ll install. Confirm the gutter length for corners and offsets, and decide where each gutter run starts and ends.
Next, map your downspout locations. You want water leaving the house and going away from the foundation. A good rule is to avoid dumping water right at a walkway edge or right next to a basement wall. This is where drainage planning matters: place downspouts where the grade naturally carries water outward.
Here’s a quick sanity check: if you have a long run, you may need multiple drop points. That’s why gutters and downspouts should be planned together—don’t just install a long gutter and “figure out the outlet later.” Put another way: if you want the gutter to actually work, decide the exit strategy first.
Slope: how to set the highest point of the gutter and the end of the gutter run
Proper slope is what makes a gutter drain instead of overflow. The goal is subtle pitch so water naturally moves to the outlet without looking crooked from the street. Use a level and measure for pitch at every 10 feet of gutter.
A common guideline is inch for every 10 feet (very slight pitch) so water moves steadily. Mark the highest point of the gutter at the end farthest from the outlet, then mark the point of the gutter run where the outlet will be slightly lower. That lower point is the end of the gutter run.
To keep it clean and straight:
Snap a chalk line or string line between your marks.
Mark the gutter line on the fascia so each bracket lands at the correct height.
Make sure the bottom of the gutter will still catch water dropping off the roof line.
If you get the pitch wrong, you’ll see standing water inside the gutter, which leads to overflow during heavy rain and shortens the life of seams and connections.

Half-round gutters are a classic rain gutter style that look great on many homes—just make sure the gutter run has the right slope and the hanger spacing is solid so water flow stays smooth into the downspout.
Rain gutter choices: material and style (what’s worth it?)
Let’s talk options, because your type of gutter affects the whole job—fasteners, corners, and how many seams you’ll deal with.
Aluminum gutters are the most common for residential installs: light, strong, and easy to cut.
Vinyl gutters can work on small sheds or light-duty installs, but they’re more likely to warp or crack in harsh temperature swings.
Seamless gutters look great and reduce joints, but they’re usually made on-site (not a typical DIY project).
Half-round gutters are a style upgrade and can be great for historic looks, but mounting hardware can differ.
Whatever you choose, keep your gutter material consistent across a run. Mixing materials can create expansion issues and ugly alignment.
One more note: the term rain gutter gets used loosely, but it simply means the channel system designed to catch rain runoff from the roof.
Installing gutters: hanger spacing, fascia brackets, and mounting to the fascia
Now the actual installing begins. Most modern systems use hangers that hook into the back of the gutter and fasten into the fascia. Your hardware choice matters: a solid hanger setup prevents sagging.
Here’s the clean approach:
Start by attaching the first bracket at the high end.
Work toward the outlet end, staying aligned with your slope line.
If your system uses fascia brackets, mount them securely before lifting the gutter into place.
When you lift the gutter up, the key is to secure the gutter without crushing it. Use the correct fasteners (many kits use sheet metal screws) and don’t overtighten.
As you go, keep checking alignment. You’re essentially creating a straight “track” so the gutter to the bracket connection remains consistent. If you notice the line drifting, fix it early. Once you start connecting multiple pieces, small errors multiply.
Also, if you have exposed rafter tails, confirm you’re fastening into solid backing—not just thin trim.
Before you install the gutters, measure and dry-fit each gutter section—then cut the gutters to length and add gutter sealant so the end cap and gutter seams stay watertight.
Step-by-step guide: assemble each gutter section with end caps and seams
Before hanging long spans, assemble what you can on the ground. It’s easier, safer, and you’ll get cleaner joins.
Dry-fit each gutter section and confirm corner angles.
Install the end cap where needed.
If you’re building from sections of gutter, plan where the gutter seams will be—try to keep seams away from heavy water concentration points.
When joining pieces:
Use gutter sealant for watertight seams.
Make sure the sealant is placed on clean, dry surfaces.
Press and hold for a secure fit, then allow cure time per product instructions.
If you need to shorten a piece, cut the gutters carefully. Measure twice, then cut gutter once. (Yes, you can laugh—this is where most people regret rushing.) Use snips or the recommended tool for your material so the cut edge stays clean and doesn’t warp.
And if you need to shape around an obstacle, turn the gutter only after you’ve confirmed the angle and the bracket placement. Don’t force a twist into a long span—it will create a low spot that holds water.
Downspout: outlet placement, downspout installation, and routing water away
A great gutter is useless if the downspout setup is wrong. Start by cutting the hole for the downspout outlet at the low end of the run (where your slope leads). Then connect the outlet piece and seal it properly so it doesn’t become a drip point.
Next comes downspout installation. You’ll connect the vertical run to the outlet, secure it to the wall, and route discharge away from the home. Remember the goal: send water away from the foundation so it doesn’t soak the base of the house.
If you have multiple drop points, you’ll be managing downspouts in different zones. Try to keep the path clean and direct. Avoid sharp zig-zags that trap debris.
A quick practical tip: if the layout forces a long horizontal run, make sure it drains and doesn’t become a water trap. You want smooth water flow from top to bottom, not a “hidden mini-gutter” that backs up.

A downspout should push water away from the foundation—clean water flow at the outlet is the easiest way to confirm your gutter drainage is working.
Drainage: where the water goes after it leaves the downspout
This is the part many people skip—then wonder why they still have puddles. A downspout should discharge onto a splash block, into an extension, or into a drainage solution that actually carries water away.
If your yard slope is poor, you might need an extension that runs farther out. The goal is to prevent repeated saturation near the base of the home and protect your home from water.
Also, don’t forget that your roof sheds a lot of water. In heavy rain, even a small roof area can dump gallons quickly. That’s why a well-planned drainage path matters just as much as the gutter itself.
If you notice erosion lines under a downspout, that’s a sign the discharge is too concentrated. Spread it out or extend it farther.
Test water flow inside the gutter and verify the run
Before you call it done, do a simple test. Use a hose and run water into the high end. Watch the water flow travel along the channel and exit at the outlet. Look underneath for drips and check the seams.
Pay attention to these red flags:
Water pooling in the middle (slope issue)
Water spilling over the back (problem where gutters to the fascia meet, or missing drip edge)
Water leaking at joints (sealant issue)
Water overshooting the outlet (alignment issue)
Also look inside of the gutter for anything that blocks the channel. Sometimes a screw tip or a deformed seam creates a snag point that collects debris. If the channel isn’t smooth inside the gutter, you’ll get clogs earlier than expected.
If you see a spot where water seems to “push back,” you may have inadvertently installed a section slightly gutter upward (a tiny reverse slope). Fixing that now saves you a season of frustration.
This is also the moment to confirm your time expectations: the time to install varies by home size, but careful layout always beats speed.

Consider installing gutter guards to keep debris out of the gutter—clean channels mean better water flow and fewer clogs in your gutters and downspouts.
New gutters: finishing touches + considering gutter guards
Once your new gutters are up and tested, check every attachment point one more time. Confirm everything is attached to the fascia correctly and that your fasteners are seated. Take a final walk around the perimeter and look for any sagging or dips.
Now, the optional add-on: gutter guards. If you have heavy leaf fall or pine needles, you may want to consider installing gutter guards so debris doesn’t clog the channel and overload the system. They’re not magic, but they can reduce cleaning frequency if you choose the right style.
Finally, stand back and confirm the look. Your proper gutter line should appear straight from the street. And remember: gutters play a bigger role than most homeowners realize—they protect trim, siding, landscaping, and the structure below.
When everything is done and sealed, that’s a successful gutter installation. At that point, gutters are installed for function—not just appearance.
Bonus: quick troubleshooting if something looks “off”
If something isn’t draining right, go back to the basics:
Re-check the slope marks and the outlet end.
Confirm each bracket is aligned with your guide line.
Verify the outlet hole isn’t too small or obstructed.
Make sure the discharge path doesn’t back up.
If you’re mid-project and need to reposition hardware, don’t guess. Use the same line method again: gutter and trace your intended height, then re-mount.
And if you’re still planning and not cutting yet, it’s okay to pause. If you only take one thing from this article: planning the run and downspouts is the difference between a system that works for years and one that overflows every storm.
Bullet-point recap: the most important things to remember
A gutter system is about control: moving water from roof to downspout and away from the home.
Measure carefully: confirm total feet of gutter, each gutter section, and where the downspout will go.
Set slope correctly so water drains—standing water inside the channel causes problems.
Attach to solid fascia and keep bracket spacing consistent to prevent sagging.
Use a proper end cap and seal seams with gutter sealant for leak resistance.
Route the downspout discharge away from the foundation to reduce water damage risk.
Test with a hose to confirm water flow and catch small issues before the first big storm.
Consider gutter guards if debris is a constant problem.