Attic Condensation or Roof Leak? Tell The Difference
Attic moisture can look like a roof leak—especially when warm air meets a cold underside and leaves damp spots on insulation and framing.
If you’re a homeowner and you see a stain or drip in the winter months, it’s normal to think you have a roof problem. The tricky part is that a leaking roof and attic condensation can look almost identical. This guide helps you sort it out so you can act fast, avoid serious water damage, and stop guessing: leaking or is it condensation?
Condensation: why it shows up in the attic in cold weather
Condensation happens when warm air inside the home carries water vapor upward and it rises into the attic. When air hits the cold underside, it can condense into a tiny droplet and leave damp marks on surfaces in your attic. You may even spot a little frost on nails after a clear, freezing night.
In the winter months, temperatures are very cold, so this effect becomes more common. That’s the basic leak or condensation question, and it matters because condensation or a leak requires different fixes.
Roof leaks vs attic condensation: what’s the real difference?
Here’s the difference between a roof leak and an attic condensation issue: a roof leak is outside water sneaking in past shingles, flashing, or a penetration. Attic condensation is interior humidity collecting on the underside of the roof and dripping back down.
Condensation isn’t a guarantee of a failing system. In fact, condensation more likely shows up across multiple areas, while a true leak often follows one track to a low point. If you’re seeing wide, scattered dampness, it’s often actually condensation.
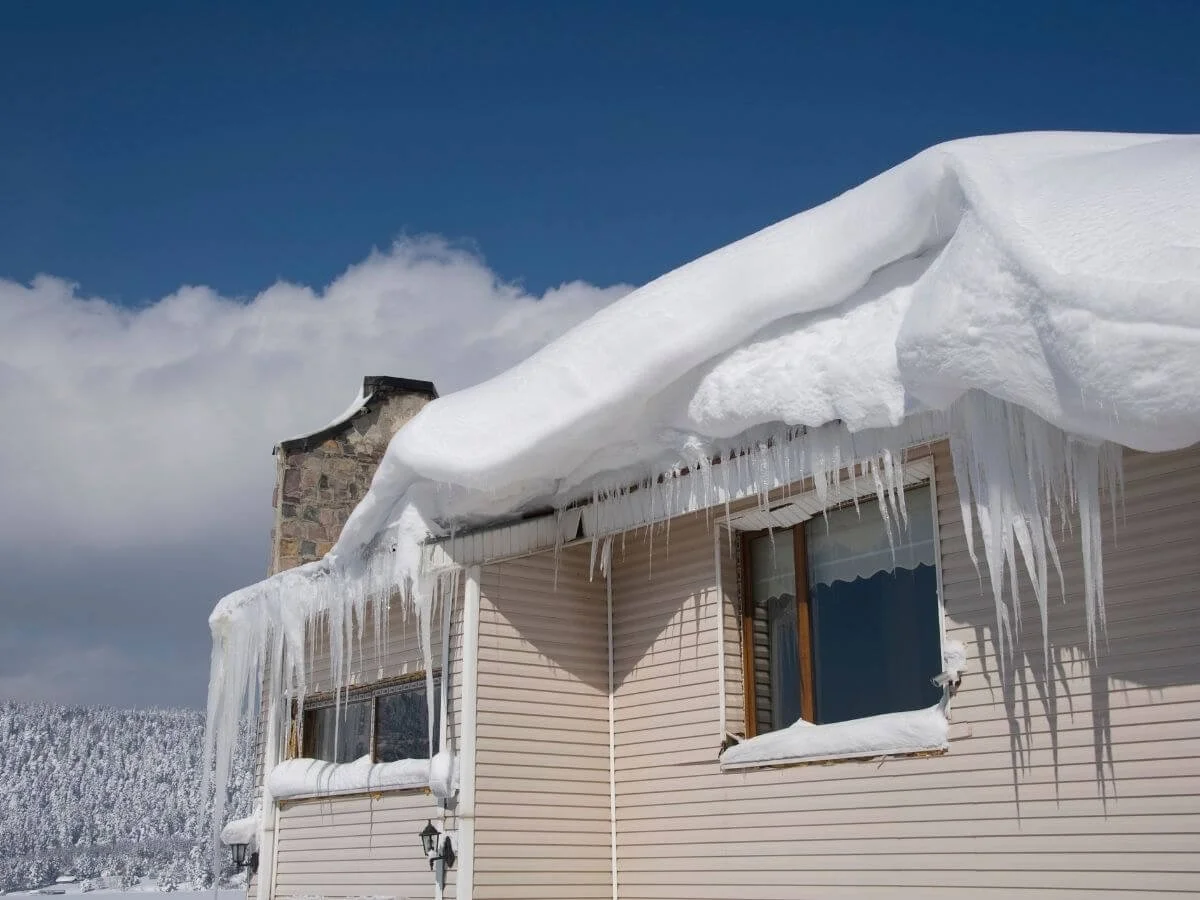
Ice dams along the roof edge can force melting snow under shingles—creating a leak that looks like attic condensation or a mystery roof leak inside.
Moisture: the fastest checklist to tell the difference
One key way to tell is to look for patterns and timing. A true leak often appears after rain, thaw, or wind-driven storms; attic condensation tends to show up after a clear, cold night.
A key way to tell whether you have condensation is to check multiple bays. If the same kind of dampness appears in several spots, you’re dealing with moisture in the attic—and you likely have moisture in your attic from indoor humidity. If it’s concentrated in one area, you may be chasing one source of the leak.
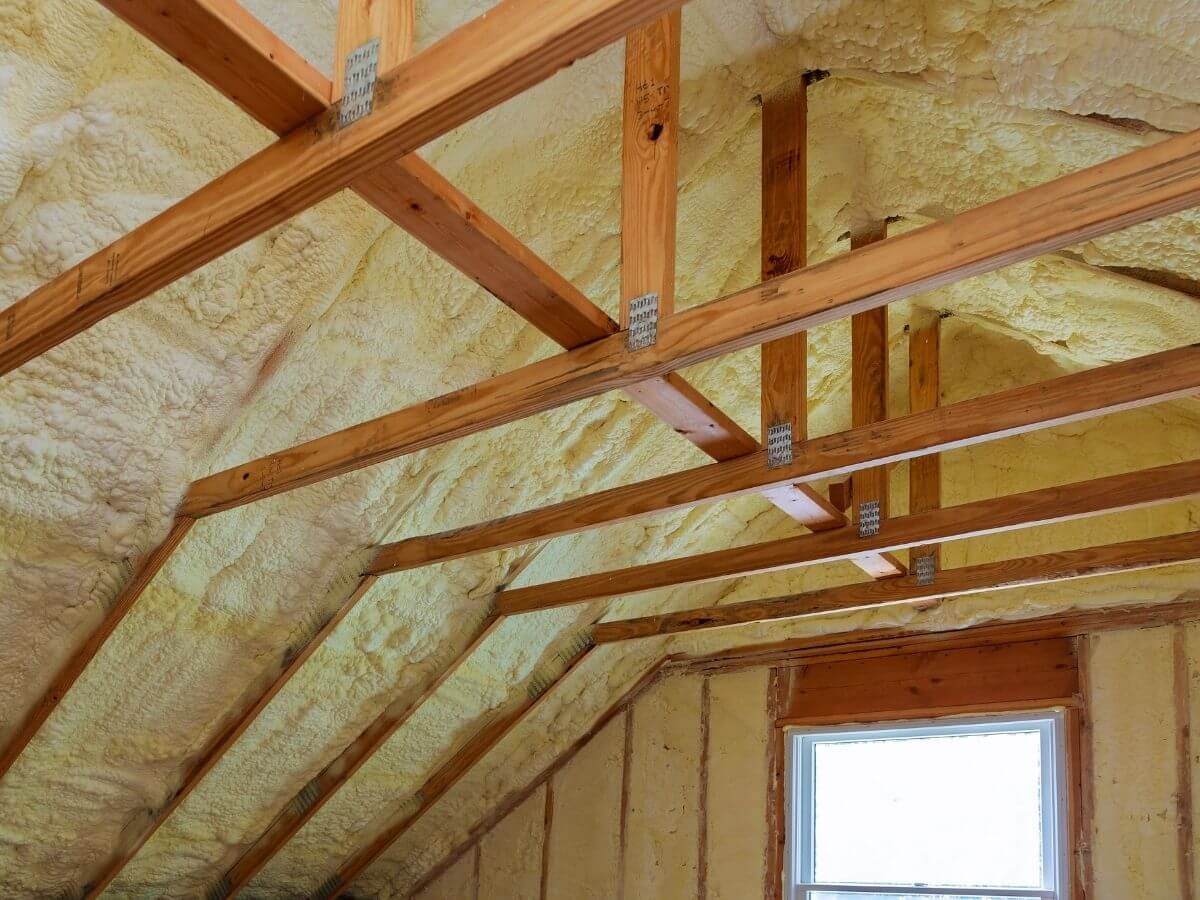
Attic: what to check first (a simple, safe walkthrough)
If it’s safe to enter the attic space, bring a flashlight and scan the roof decking for dark streaks, shiny beads, or soft areas. Then check around penetrations. You only need a few minutes to spot obvious issues.
Next, inspect insulation. Look for clumps, compression, or discoloration. If parts of your insulation feel heavy or matted, that’s a clue. If you can clearly see that insulation are wet, treat it as urgent and move to diagnosis right away.
Roof: the most common leak points (without climbing)
Roof leaks typically start at details: flashing, valleys, and penetrations. From the ground, inspect your roof with binoculars and look for missing shingles, broken shingles, and a damaged shingle edge near a pipe or chimney. Check the area around a skylight once, too—those transitions matter.
If you suspect a leaky roof but can’t see anything obvious, look at your roof again after the next storm and note any changes. Exterior clues can help you identify the source without stepping on the surface.
Air movement: mistakes that create condensation problems
Drafts don’t just feel uncomfortable—cold air can move humidity to the coldest surfaces faster. A poor exhaust layout or an oversized fan can pull warm air out of the bathroom and push it upward, feeding attic moisture.
Good ventilation is about balance. A ridge vent can work well, but only when intake paths are open and the vent installation was done correctly. If the attic stays stuffy, moist air lingers longer and that can lead to mold.
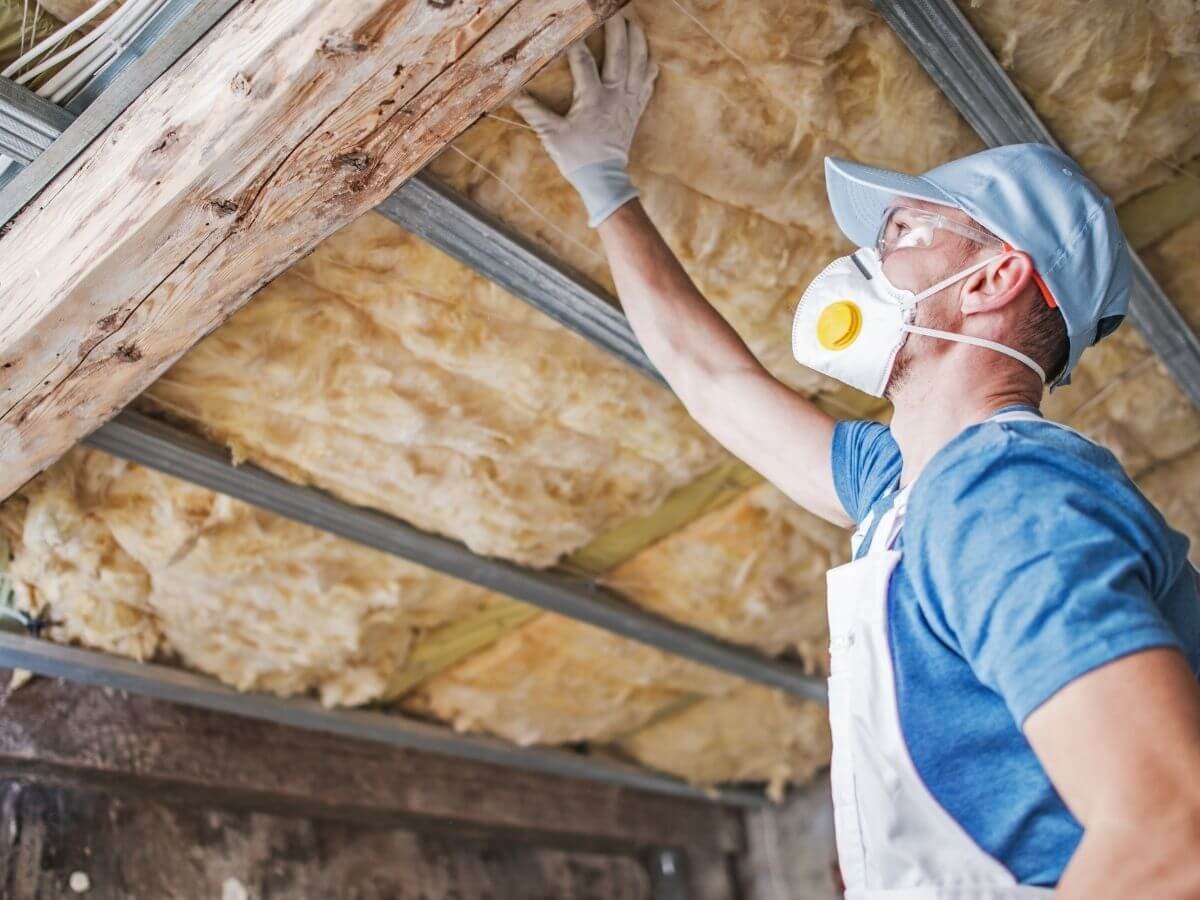
Before adding more insulation, seal attic bypasses and improve airflow—otherwise warm, moist air can rise into the attic and trigger condensation problems.
Insulation: when more helps (and when it makes things worse)
Many people jump straight to adding more insulation, but that’s only half the story. If you add insulation without sealing leaks between living space and attic, you reduce heat at the top while still letting humidity escape upward—so the surfaces stay cold and damp.
The fix is to air-seal first, then insulate. Pay special attention to attic bypasses (around lights, pipes, and the hatch). Sealing those reduces how much water vapor seeps into your attic and makes your attic insulation perform the way it should.
Moisture in the attic: quick DIY steps to reduce damage today
If you notice any type of moisture, start with the basics: run the bath fan longer after showers, keep the door open to dry the room, and check that the fan duct actually exits outdoors. Then, dry what you can safely reach and document the pattern with photos.
If you suspect an actual roof leak, don’t smear random sealant. Your goal is to locate the source, not hide it. Temporary measures are fine, but you want a plan that prevents water damage and potential mold.
Winter backups: when ice dams turn into a leak
Ice dams often form when heat escapes, melts snow higher up, and the water refreezes at the eaves. When you see ice dams along the edge, water can back up under shingles and drip inside—making it look like a mystery roof leak.
If you get repeat winter dripping near exterior walls, consider both insulation and airflow. Fixing heat loss and air movement usually lowers the risk far more than a patch.
Homeowner repair? When to call a roofer
A small, obvious fix—like replacing a damaged shingle or resealing a flashing edge—can be a simple repair for the right person. But if you can’t safely confirm the source, it’s time to call a roofer.
A roofing contractor can separate roof leak and condensation scenarios fast and recommend the right next step, whether that’s targeted roof repairs, improved venting, or planning for roof replacements. If the surface is near end-of-life and you’re already patching repeatedly, it may be time to plan a new roof instead of chasing the same leak again.
Bullet-point summary: what to remember
Condensation and roof performance are connected: when humid air meets colder surfaces, it can drip like a leak.
Look for evidence of condensation across multiple bays, not just one streak.
The roof from the outside can reveal missing tabs, torn shingles, or damage near penetrations.
Balance venting and ventilation; it works best when intake is clear and installs are done correctly.
Seal attic bypasses before adding extra insulation.
If you see signs of water or can’t find the entry point, get a pro involved early to avoid major damage.
Untreated moisture can create damage and mold growth, so take action quickly.