Fix Roof Leak Around Chimney: Simple Repair Guide (DIY + When to Call a Pro)
A roof leak around a chimney usually starts at the flashing—especially where the chimney meets the roof—so checking for loose or damaged metal is the fastest way to find the source.
A roof leaking around chimney is one of the most common—and most fixable—home leaks. The tricky part is that the water often isn’t coming from where it shows up inside. In this guide, you’ll learn why a chimney leak happens, how to inspect the area where the roof meets the chimney, and which flash and sealant fixes actually work. We’ll cover quick DIY steps, what to do if you have old flashing or damaged mortar joints, and when it’s smarter to call a roofer or roofing contractor to avoid water damage and future leaks.
1) Why is my roof leaking around chimney in the first place?
Most leaks happen where the roof and chimney connect because that joint has multiple materials moving at different rates. Over time, masonry and shingles expand and contract, and tiny gaps form around the joint. Those gaps can let water seep in—especially in windy rain—eventually leading to leaks inside.
Another big cause of roof problems is aging flashing. Flashing material around a chimney can corrode, loosen, or separate from the wall. If you’ve got an old chimney or past patch jobs using tar, the area may look “sealed” but still route water behind the metal.
2) Start here: Inspect the chimney flashing (and the roof near the chimney)
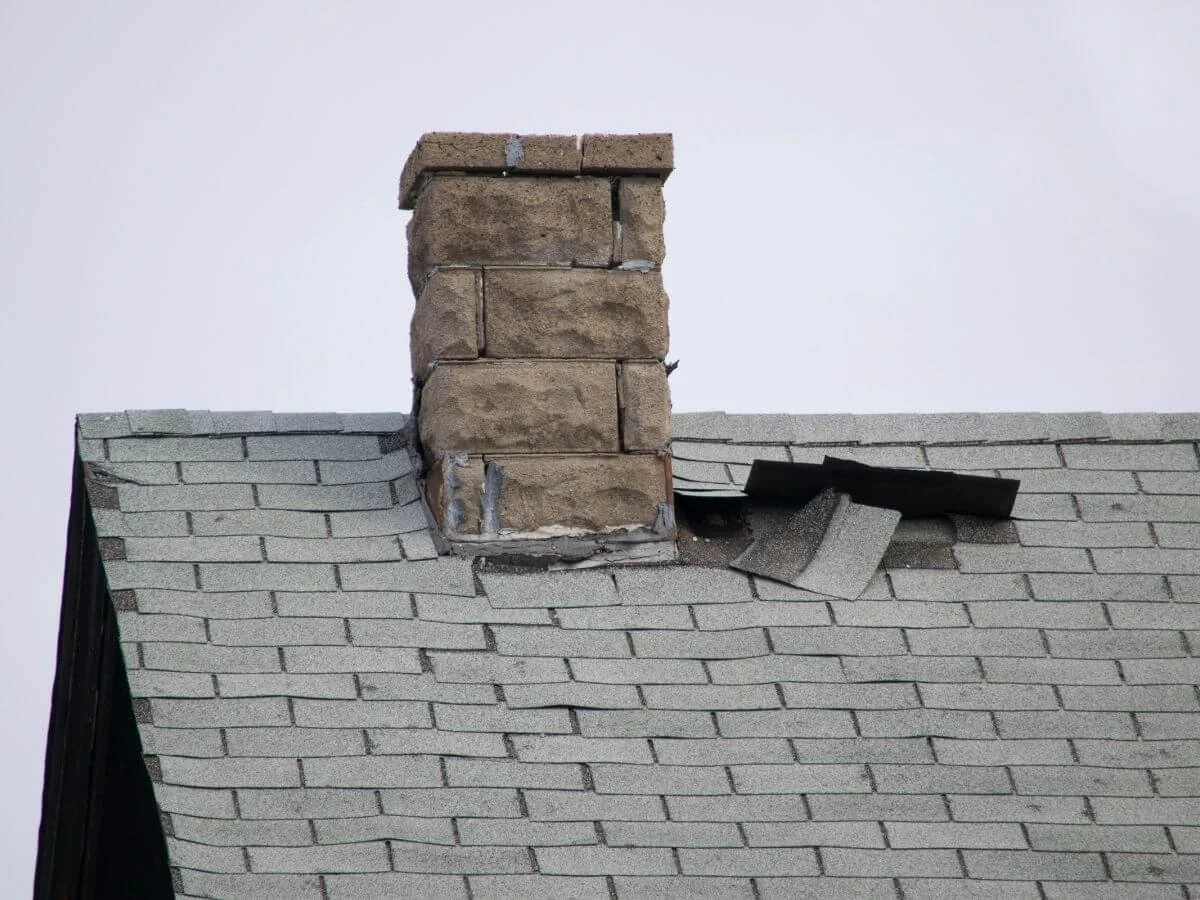
Before you try to fix anything, do a careful check. If you safely went up on the roof, look for gaps at the side of the chimney, lifted shingle edges, and stains behind the chimney area where water can pool and then run downward.
Next, inspect the chimney flashing closely: look for loose flashing, bent corners, and cracked sealant around the flashing. If water is entering near the chimney, you’ll often see dark marks on the decking or rust trails on metal.
Proper chimney flashing is layered to shed water—base flashing and step flashing under the shingles, with counter flashing built into the brick—so water stays on the roof instead of finding a way in.
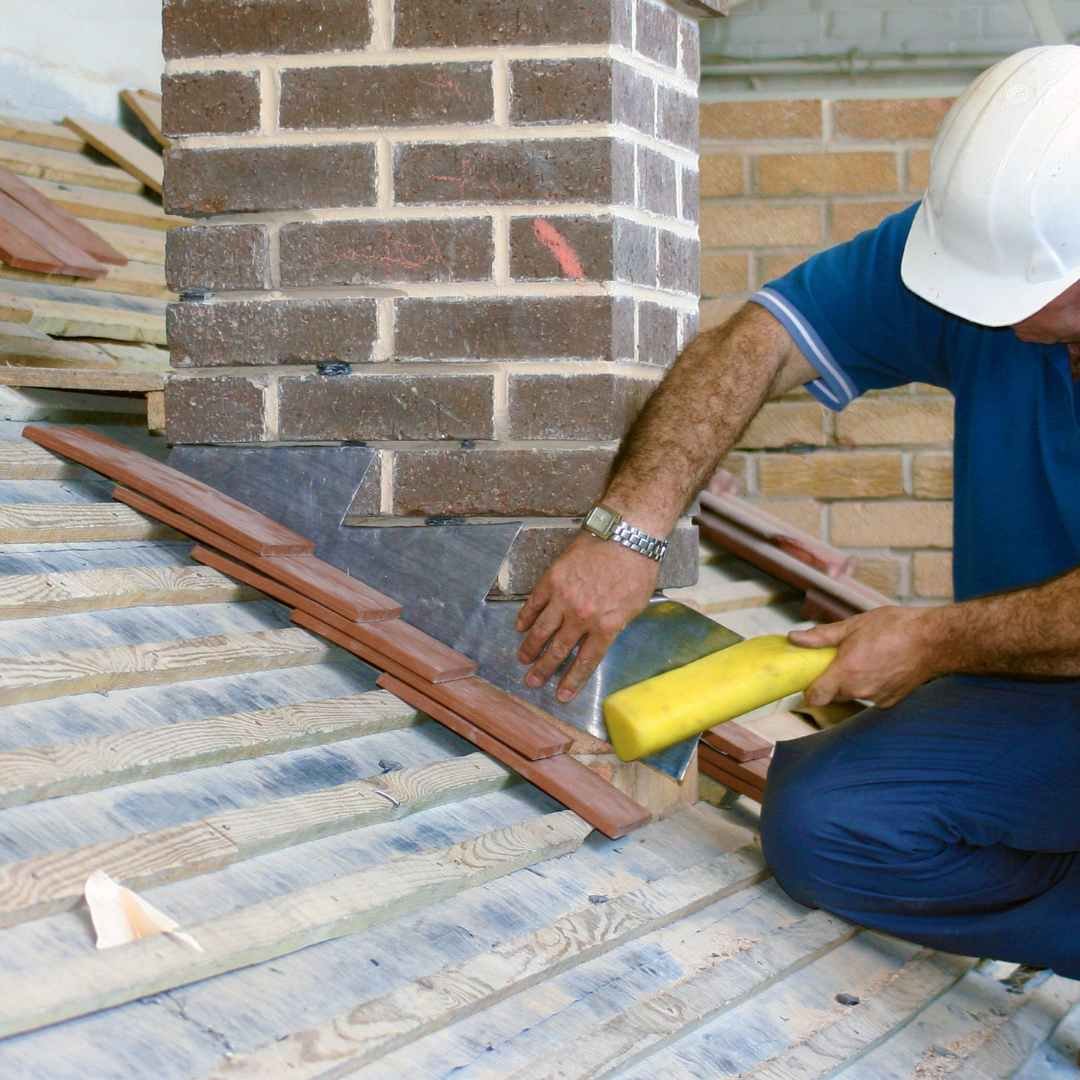
3) Flashing 101: Base flashing, step flashing, and counter flashing
To stop a roof leak, you need the right type of flashing in the right place. Most systems use base flashing at the bottom, layered with shingles, plus step flashing along the sides. A proper install includes counter flashing that tucks into the masonry so water sheds outward—not inward.
If you see exposed nails, missing pieces, or gaps at the flashing edges, the system can fail even if the shingles look fine. Good repairs depend on how the installed flashing was done and whether the roofer used compatible metal pieces for the roof type.
4) Roof leaks near chimneys: common failure points (and what they look like)
Many roof leaks around a chimney start when water gets trapped upslope and pushed under shingles. That’s why leaks may appear as a ceiling stain far from the actual entry point. Look for worn shingles away from the chimney, cracked sealant lines, and damaged metal where water concentrates.
Also check the “back” side of the chimney (the upslope side). If the area behind the chimney flashing is poorly shaped, water can sit and find a path inside. You may notice a small drip inside during heavy rain, even if it seems dry most days.
5) Quick DIY checks: sealant, caulk, and waterproof the right way
For minor issues, you may be able to seal small gaps and buy time—especially if the flashing is intact but the joints have separated. Use a high-quality sealant rated for roofing, and apply sealant around the joint only after the surface is clean and dry. Overuse is a common mistake: too much sealant can trap water.
Use caulk sparingly on small seams, not as a replacement for metal flashing. If you want to waterproof the masonry surface, choose a breathable product like waterproof masonry sealant and apply it to the brickwork—not the flashing seams.
6) When you need to repair flashing (and remove the old flashing)
If the metal system is failing, you’ll need to repair flashing rather than just smear sealant. Signs include lifted edges, visible gaps, or a recurring leak that returns after every storm. In those cases, the proper fix is to carefully remove the old flashing sections that are damaged and replace them with new pieces that integrate with the shingles.
This is where a roofer can be worth it. If the flashing is tied into the chimney incorrectly, you can create new leak paths by disturbing shingles. A good roof repair here isn’t complicated—but it must be layered correctly so water sheds down and out.

A lifted or damaged shingle can let water slip under the roof layers—especially near flashing—turning a small issue into a roof leak fast.
7) Chimney masonry problems: mortar, brickwork, and the chimney crown
Sometimes the roof isn’t the main problem—the chimney is. Cracked mortar or missing mortar joints can absorb water and then release it inside, making it seem like a roof leak. Check for spalling brick, loose pieces, and soft spots that crumble with a light scrape.
Also inspect the chimney crown (the top cap). A cracked chimney crown can let water enter, travel down the interior, and show up as leaking inside even when the roof layers are fine. If you have a brick chimney, repairing damaged mortar and sealing the masonry can make a huge difference.
8) Shingles and gutters: small issues that create big leaks
A roof can leak around the chimney simply because water is being routed incorrectly. Broken shingles, missing seal strips, or a damaged asphalt shingle near the flashing can allow water under the layers. Replace any torn or curled pieces and make sure the shingle course lays flat.
Don’t ignore the gutter system. Overflowing gutters can dump water around the chimney area, soaking the roof deck and driving water into weak points. Fixing drainage often reduces leak risk immediately—especially during heavy rain.
9) New roof vs. repair: when is it time to call roofing companies?
If you’ve patched multiple times and the leak keeps returning, the issue may be larger than one seam. A new roof might be the more cost-effective choice when shingles are near end-of-life and the flashing system has been repeatedly disturbed.
If you’re seeing stains or soft decking, consider calling roofing companies for an evaluation. A professional roofing contractor can identify the cause of roof failure in minutes, then recommend whether the best solution is spot repair, partial replacement, or a full re-roof. This is especially important if you suspect damaged flashing or a damaged chimney structure.
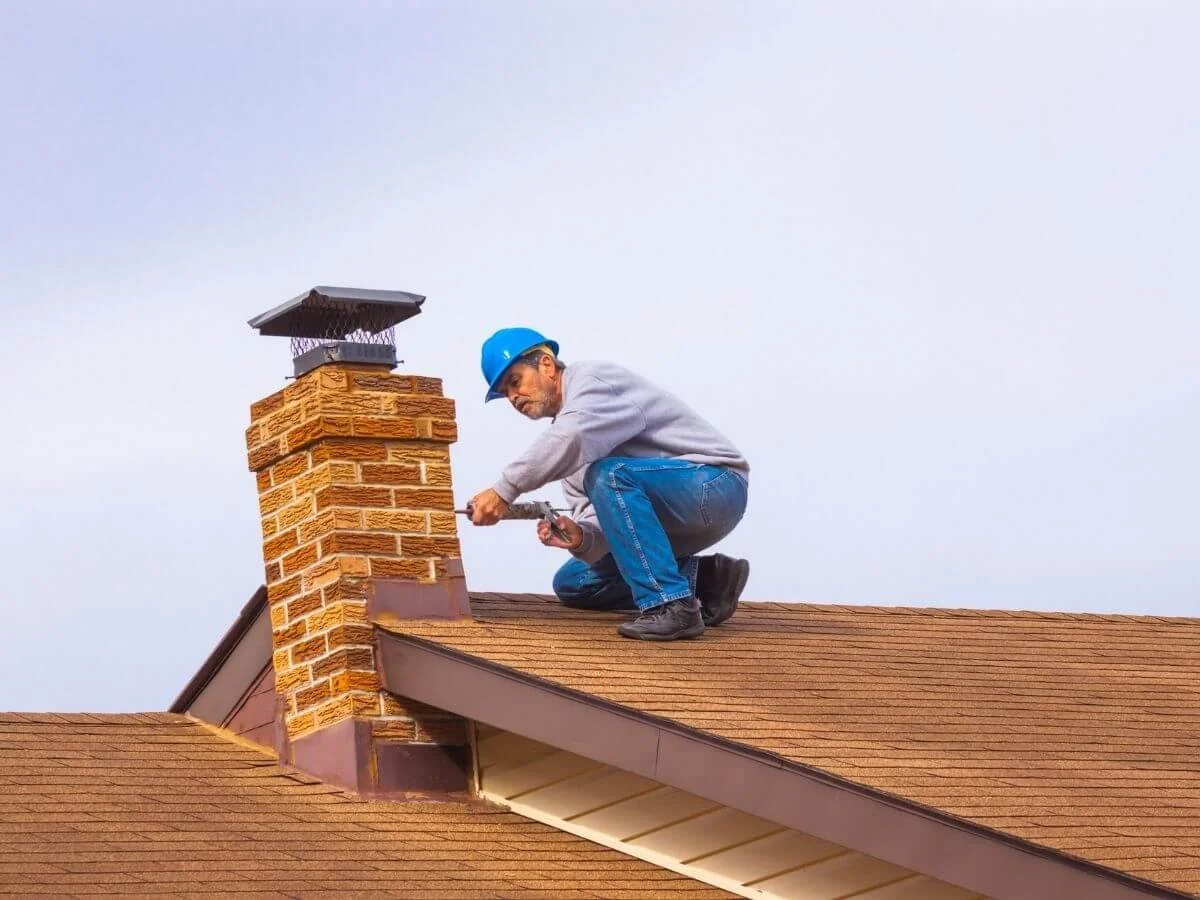
When leaks keep returning, a roofer can inspect the chimney flashing and roof connection to find the real entry point and stop future leaks.
10) Repair the chimney leak or fix the roof: a simple decision guide
Use this quick guide:
If the leak shows up only in wind-driven rain and you see gaps at the metal seams, focus on the flashing system where the chimney meets the roof.
If the masonry is crumbling or joints are missing, prioritize repair the chimney before you redo roof work.
If the leak returns after sealing, the water is probably traveling behind the metal, which usually means replacement—not more caulk.
If you’ve got a chimney without obvious flashing issues but still see water staining, look at masonry absorption and crown cracks first. And if you’re unsure, a roofing contractor assessment is usually cheaper than chasing repeated interior damage.
Key takeaways (save this checklist)
A roof leaking around chimney usually traces back to the flashing system or masonry joints—not the shingles alone.
The best place to start is to inspect the area near the chimney and inspect the chimney structure at the same time.
Proper flashing includes base flashing, step flashing, and counter flashing—each has a job.
Don’t rely on tar as a long-term fix; it often hides the problem and fails later.
Use sealant and caulk carefully; they help small gaps but can’t replace missing metal.
A failing system often requires you to repair flashing around your chimney or replace sections of old flashing correctly.
Masonry issues—cracked cement, failing mortar, and damaged brickwork—can mimic a roof leak.
Keep shingles sound, especially any shingle pieces tight around chimney areas, and manage gutters so water doesn’t pool.
If you’re getting recurring stains or damage inside, call a roofing contractor before the next storm causes bigger water damage.
When the chimney and roof connection is rebuilt correctly, you dramatically reduce the risk of future leaks at the joint where the chimney meets roof.