Concrete Foundation Crack Repairs: DIY Kits vs. Professional Foundation Crack Repair
Hairline or widening, a concrete foundation crack can signal settling—or a path for moisture and water seepage—so it’s worth checking early before it grows.
Foundation issues can feel scary, but many crack repairs are straightforward once you identify what you’re dealing with. This balanced guide explains foundation crack repair for the typical homeowner: why a crack forms, how to choose a kit or repair kit, when injection is the right fix, and when to call a professional or contractor for foundation repair. You’ll also learn how to seal problem areas to manage moisture, stop a leak, and prevent further damage—without overpaying.
1) What causes a crack in a concrete foundation?
Most cracks form when a home starts to settle and the ground shifts. Changes in soil moisture can make the ground move—especially after heavy rain or drought—creating stress in the wall. During the original pour, small weak points can develop, and later that stress shows up as a visible line.
A small crack in the foundation isn’t automatically a crisis, but it can become a pathway for intrusion. Over time, that can turn into water seepage, a slow leak, and a persistently damp area that invites bigger problems.
2) Is my foundation crack structural or just surface damage?
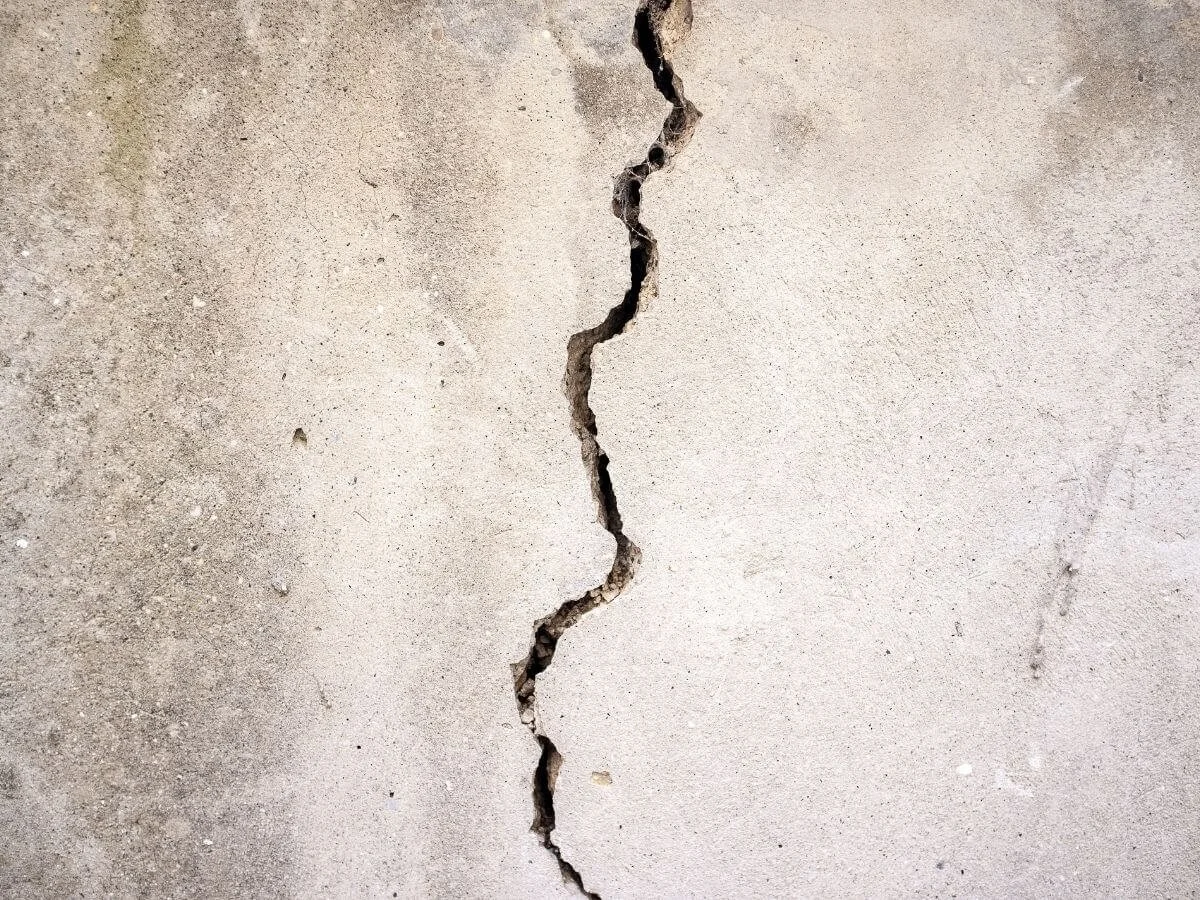
A foundation crack can be cosmetic, or it can affect structural integrity. Hairline lines on the surface of a wall may be minor, while wider gaps, shifting, or repeated movement can signal a more serious structural issue.
Watch for clues like sticking doors, sloping floors, or a crack that grows. If you’re unsure, monitor the line for a few weeks and note any change in width. That quick check helps you judge severity and decide between DIY repair and professional repair.
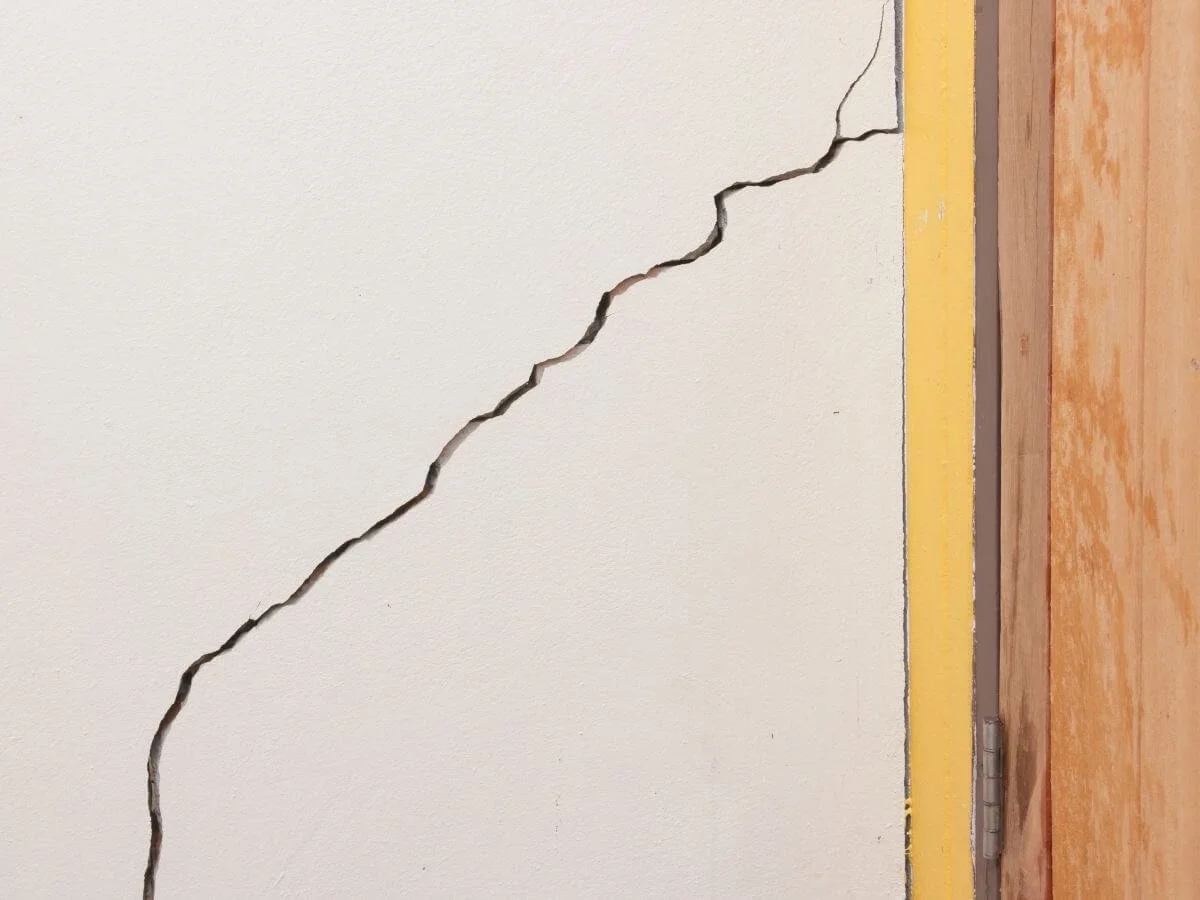
3) Vertical vs. diagonal cracks: what do they mean?
A single vertical line often appears as a home settles; in many cases it’s manageable with the right foundation crack repair kit if the wall is otherwise stable. If the line runs vertically and stays the same size, DIY crack repairs may be reasonable.
Diagonal cracks are more concerning because they can indicate uneven movement. One set of diagonal cracks plus new interior symptoms may justify calling a contractor for foundation repair evaluation.
Basement wall cracks can become a direct path for moisture and water seepage—so if you notice staining, damp areas, or a leak, it’s smart to seal the crack and address drainage early.
4) Basement wall cracks, crawl space access, and exterior warning signs
Location changes the best repair approach. Basement wall cracks are common because below-grade walls face water pressure, often leading to water problems. If you see stains, odor, or dampness, you’re likely dealing with moisture migration—so your goal becomes to seal and prevent water entry.
In a crawl space (or crawl area), cracks can be easier to inspect and patch. Don’t ignore the exterior, though—outside grading and gutter flow can reduce pressure and help prevent new damage before you pick a product.
5) When does a DIY foundation crack repair kit make sense?
DIY is best for stable gaps where the goal is stopping water and protecting the wall, not rebuilding the structure. A solid foundation crack repair kit can be a cost-effective option for minor cracks if you’re a bit handy and follow the directions.
You’ll see plenty of options at Home Depot. Choose crack repair kits that match your situation (water control vs strength). Most include a kit with ports, paste, and tools—sometimes marketed as a repair kit specifically for foundation crack repair.
6) Epoxy crack injection vs. polyurethane foam for foundation crack repair
Two common methods are epoxy injection and polyurethane systems. Epoxy is usually chosen for strength, while polyurethane is often chosen for water control. If you’re working on a potentially structural gap, use professional-grade epoxy and follow cure times; many products label the resin as professional-grade.
If the main issue is water, polyurethane foam can expand into voids and reduce seepage. Used correctly, it can help stop a leak and keep the wall dry without overbuilding the repair.
7) How crack injection works: ports, surface prep, and injection kits
Crack injection works by filling the void from the inside out rather than smearing a topical patch. The process usually involves cleaning the surface, attaching a port system, sealing the face, then injecting until the void fills.
You’ll see products described as injection kits or crack injection kits. What matters is consistency of injection materials and good prep. If you rush and the face seal fails, the material can leak out and the repair won’t hold.
8) Step-by-step DIY crack repairs (short version)
Start by cleaning the area and removing dust, paint, or loose debris. If you’re fixing a crack with a port system, space ports along the line and seal the face with a paste or mortar-like compound. Let it set.
Then inject slowly from the lowest port upward. For water control you might use polyurethane, and for strength you might choose epoxy. The goal is controlled filling with reliable repair materials so the fix stays durable.

When cracks keep growing or you’re seeing signs of movement, a professional foundation repair inspection can confirm the cause (soil, drainage, settling) and help prevent further damage before repairs get expensive.
9) When to hire a professional or contractor for foundation repair
Call a professional when gaps widen, walls bow, multiple lines appear, or you see repeated cracks around doors/windows. A qualified contractor can check movement causes (drainage, grading, soil conditions) and recommend the right foundation repair method.
This is especially important with older walls or block foundations, where the best repair solutions may be different than poured concrete. A pro can also confirm whether the issue is cosmetic or threatens the home’s stability and safety—helping you keep your home protected.
10) Prevention: stop future repair needs and protect your foundation
Prevention is cheaper than repeated repair. Control roof runoff, extend downspouts, and slope soil away from the house to reduce pressure on the wall and prevent repeating issues.
Inside, keep humidity down and watch for new stains. A good long-term plan is a simple foundation repair solution: manage drainage, reduce moisture, and address small gaps early so they don’t expand over time.
Key fix takeaways for homeowners
A foundation crack is common, but it can lead to moisture, intrusion, and water seepage if ignored.
A stable foundation crack may be handled with a foundation crack repair kit; active movement may need professional help.
Epoxy injection is often for strength; polyurethane foam is often for water control.
Good prep (clean surface, solid port seal, steady injection) determines whether the repair lasts.
Use a repair kit only when the wall is stable; hire a contractor when symptoms suggest structural risk.
Address drainage and grading to prevent further damage and reduce the need to repair cracks.
The right DIY approach can be long-lasting and feel close to permanently fixed when the underlying cause is controlled.
If you see an epoxy crack scenario (strength needed), don’t guess—match the product to the problem and prioritize safety.
Small fixes (including a simple cement touch-up where appropriate) should never replace evaluating the true cause and overall severity.